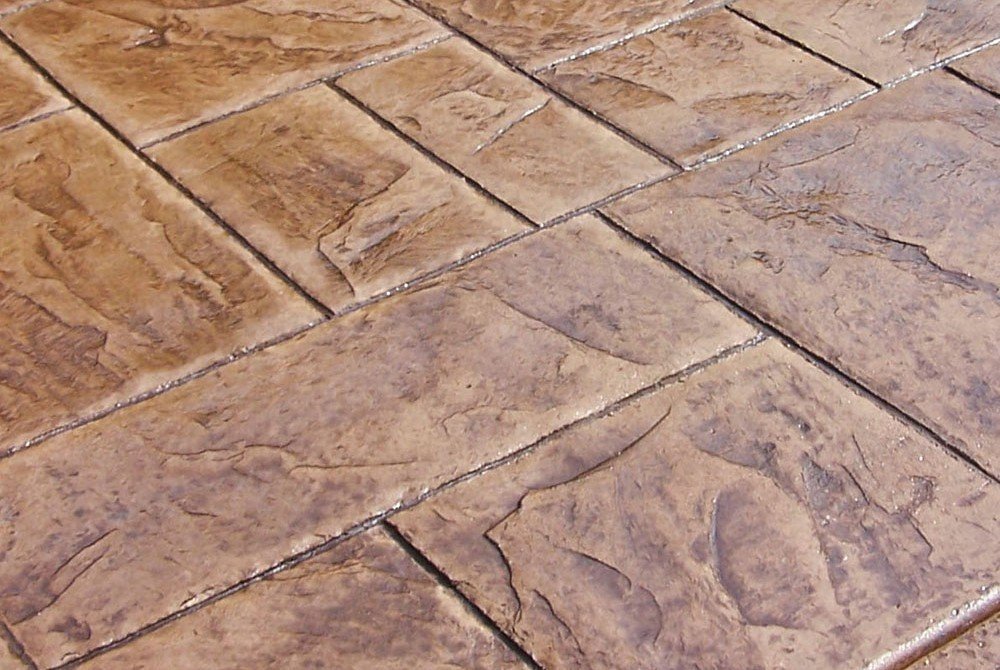
Stamped concrete is a popular method of enhancing plain concrete surfaces to imitate the appearance of natural stones, bricks, or even wood. It's an excellent choice for patios, walkways, and driveways, providing both durability and aesthetic appeal. For anyone diving into the world of decorative concrete, understanding the basics is essential. This section will help you grasp the core concepts you need in this *Beginner's Guide to Stamped Concrete*.
At its essence, stamped concrete involves pouring a special mix of concrete and then imprinting it with patterns or textures before it sets. During the stamping process, various tools are used, including mats with designs that resemble different materials. The mixture can also be tinted with colors, allowing for a wide range of customization. This versatility is one of the main reasons stamped concrete has become increasingly popular among homeowners.
One of the key aspects to consider when working with stamped concrete is the timing. The concrete must be in a specific stage of curing when the stamping is applied; this is typically within a few hours of pouring. If the concrete is too wet, it can slump or distort, while if it’s too dry, it won’t accept the patterns well. A well-timed application ensures that the surface captures those beautiful textures and designs effortlessly.
Maintenance is another crucial point to remember in this *Beginner's Guide to Stamped Concrete*. While it is generally durable, stamped concrete requires regular upkeep to maintain its appearance. Periodically sealing the surface can protect it from moisture, staining, and fading. Simple cleaning routines, like sweeping and occasional pressure washing, can also help prolong the life of your stamped concrete surfaces, keeping them looking gorgeous and serving you well for years.
Choosing the Right Materials
The concrete mix itself is the foundation of your project. For stamping, a higher strength mix is often recommended to withstand the pressure of stamping tools and to hold up over time. Look for a mix with a compressive strength of at least 4,000 psi. Additionally, incorporating additives like color pigments or stains can enhance the aesthetic appeal. These materials come in various shades, allowing you to achieve the look you desire.
Don’t forget about the release agent! This is a critical component that prevents the stamps from sticking to the concrete. There are different types of release agents available, including powder and liquid forms. A powdered release agent tends to provide better results with a more pronounced texture, while liquid agents can offer a more uniform finish. Choosing the right release agent can significantly influence the final look of your stamped concrete, making it an essential consideration in this Beginner's Guide to Stamped Concrete.
Lastly, consider the sealing products. A good concrete sealer protects your stamped concrete from weather, stains, and wear. Sealers come in various forms such as penetrating, film-forming, and water-based options. Depending on your budget and the desired finish, you’ll want to select a sealer that complements your project while enhancing durability. With the right materials identified, you'll be well on your way to creating stunning and lasting stamped concrete surfaces!
Step-by-Step Installation Guide
Installing stamped concrete is a rewarding project that can enhance the beauty of your outdoor space. In this Beginner's Guide to Stamped Concrete Essentials, we’ll walk you through the steps to successfully complete your installation. Whether you're a DIY enthusiast or just starting out, these instructions will help you achieve great results.
Step 1: Gather Your Materials
Before diving in, make sure you have all the necessary materials. You'll need concrete mix, a concrete mixer or a wheelbarrow, stamps, release agent, a trowel, a float, and a finishing broom. Having everything ready will make the process smoother and quicker.
Step 2: Prepare the Area
Next, prepare the area where you’ll be pouring the concrete. Clear any debris, grass, or soil, and level the ground to create a solid base. You may want to outline the area with stakes and string to define the shape of your stamped concrete. This ensures your design stays consistent.
Step 3: Pour the Concrete
Once the area is ready, mix the concrete according to the package instructions and pour it into your designated space. Use a trowel to spread the concrete evenly and create a smooth surface. Don’t forget to add the release agent on top, as this will help the stamps come off easily.
Step 4: Stamp the Concrete
Now comes the fun part! Begin stamping your concrete while it’s still wet. Press the stamps firmly into the concrete, by working from one side to the other. Be sure to follow the manufacturer’s instructions for your specific stamps to achieve the best results. Once you’ve finished stamping, let the concrete cure properly to ensure durability.
Essential Maintenance Tips for Longevity
Proper maintenance is key to ensuring your stamped concrete remains vibrant and durable for years to come. Following the tips outlined in this section will help you maximize the lifespan of your beautiful outdoor feature. This is essential for anyone who reads our Beginner's Guide to Stamped Concrete and wants to keep their investment looking fresh.
Firstly, it's important to clean your stamped concrete regularly. Use a broom or leaf blower to remove debris like leaves, dirt, and dust. For deeper cleaning, a pressure washer can remove stubborn stains. Just remember to use a low-pressure setting to avoid damaging the surface. Incorporating a cleaning solution designed specifically for stamped concrete can help maintain its appearance without harming the finish.
Secondly, applying a sealant is crucial. This protects the surface from weather elements and stains. Ideally, seal your stamped concrete every 1-3 years, depending on the amount of traffic it sees. Make sure to choose a high-quality sealant that suits the finish of your concrete. This step is often highlighted in our Beginner's Guide to Stamped Concrete, emphasizing its impact on longevity.
Finally, be mindful of seasonal changes. In colder climates, avoid using de-icing salts that can damage the surface. Instead, opt for sand for traction during icy conditions. Regularly checking for cracks or damage and addressing these issues promptly will also help. By following these essential maintenance tips, your stamped concrete will remain as stunning as the day it was installed.